


Photo Resizing
for use on the web
There are a number of image editors available. Below find directions to resize an image using Paint.Net, Preview (Macintosh) and Microsoft Photo Editor. Directions to edit an image already uploaded to Ingeniux are here.
| Recommended Image Sizes: | Recommended Resolution: |
| Right Column: Width: 150px - maximum Height: 110px suggested - can vary | 72 to 96 ppi |
| Main Editable Region: Width: 500px - maximum Height: can vary |
RESIZING WITH PAINT.NET
1. Open the image to be resized.
2. Select Image > Resize
3. Change the width to 150 (right column) or 500 (main editable); resolution - 72ppi
4. Save the file as a jpeg (photos) or gif (clip art)
5. Use Save-as if you want to keep the original file
RESIZING WITH PREVIEW (MACINTOSH)
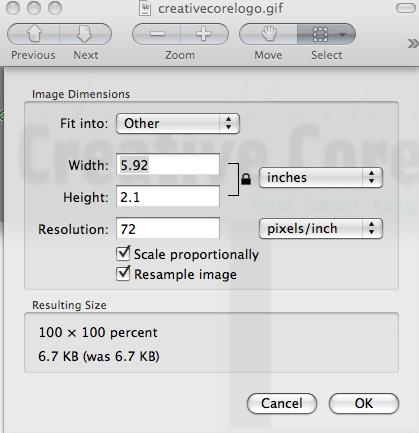
1. Open the image to be resized.
2. Select Tools > Adjust size
3. Change the width to 150 (right column) or 500 (main editable); resolution - 72ppi.
4. Save the file as a jpeg (photos) or gif (clip art)
5. Use Save-as if you want to keep the original file
RESIZING WITH MICROSOFT PHOTO EDITOR:
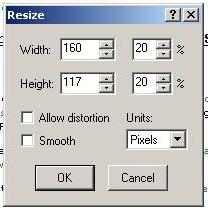
1. Open the image to be resized in Photo Editor
2. Select "Resize" from the Image menu
3. In the bottom left corner of the window that pops up change the Units to "Pixels"
4. Change the width to 150 (right column) or 500 (main editable)
5. Leave the other boxes unchecked
6. Click on OK
7. Select "Properties" from the File menu
8. Change the resolution box to 72 if it isn't already set to 72 ppi
9. Save the image as a .jpg
10. Use "Save As" if you don't want to delete the original